Wyze Cam V2 App: Detailed Instructions for Installing the Wyze Cam v2 App
Introduction to Wyze Cam V2 App for Android
The Wyze Cam v2 setup App is a flexible and reasonably priced Smart security camera that gives consumers a potent tool for remote space monitoring. The Wyze Cam v2 streamlines the installation process and enables customers to configure and control their cameras in a snap. This article will show you how to set up the Wyze Cam step-by-step for a hassle-free monitoring experience.
System Prerequisites to Install the Wyze Cam v2 Setup App
It’s crucial to confirm that your devices fulfill the prerequisite system requirements for a quick and easy setup procedure before starting the Wyze Cam v2 setup process. The system requirements that you should think about are as follows:
iPhones and iPads:
- Device Compatibility: iOS 9.0 or later-running iPhone, iPad, and iPod Touch devices are required in order to use the Wyze Cam v2 software. Make sure that your iOS device is compatible with this range.
- App Store: To make it simple to download and install the Wyze App, make sure your iOS device has access to the App Store.
Android-based devices:
- Device Compatibility: Android smartphones running Android 5.0 (Lollipop) or later are compatible with the Wyze Cam. To make sure your smartphone complies with this criteria, check the Android version.
- Google Play Store: In order to download and set up the Wyze App on your Android smartphone, you must have access to the Google Play Store.
Step by Step Guide on Installing Wyze Cam V2 App For Android
Step 1: Setting Up Your Wyze Cam v2 After Unboxing
Unbox your Wyze Cam v2 and locate an appropriate spot before starting the app setup. The camera is simple to mount on a variety of surfaces thanks to its small size and magnetic base.
Step 2: turn on your camera
Connect your Wyze Cam v2 to the provided USB cord and power adapter. Wait for the camera to turn on after plugging the adapter into an electrical socket. When the camera is prepared for setup, the status light will blink yellow.
Step 3: Download the Wyze app
On your smartphone or tablet, access the Google Play Store (Android) or the App Store (iOS). Download the official Wyze App by doing a search for “Wyze”.
Step 4: Create a Wyze account
Launch the Wyze App, then select “Sign Up.” Use your email address and a strong password to establish a Wyze account by following the on-screen instructions.
Step 5: Add a Device
To add a new device after logging in, hit the “+” symbol in the top-left corner. From the list of compatible devices, pick “Wyze Cam v2”.
Step 6: Get Your Camera Ready
You will be prompted by the app to get your Wyze Cam v2 ready for setup. Ensure that the status light on your camera is blinking yellow and that it is plugged in.
Step 7: Connect to Wi-Fi
You may follow the instructions in the app to connect your Wyze Cam v2 to your Wi-Fi network. When asked, choose your network from the list and input your Wi-Fi password. The camera will connect by scanning a QR code created by the app.
Step 8: Wait for the connection
Put your tablet or smartphone in front of the camera so it can read the QR code. When the camera successfully connects to your Wi-Fi network, the status light on the device changes to solid blue.
Step 9: Give your camera a name.
Name your Wyze Cam v2 something special that describes its surroundings, like “Living Room” or “Front Door.”
Step 10: Position and fine-tune
As you position your Wyze Cam v2 for best coverage, remember to change its angle and orientation. To adjust the camera’s position, use the live view feature of the app.
Step 11: Turn on Alerts and Notifications
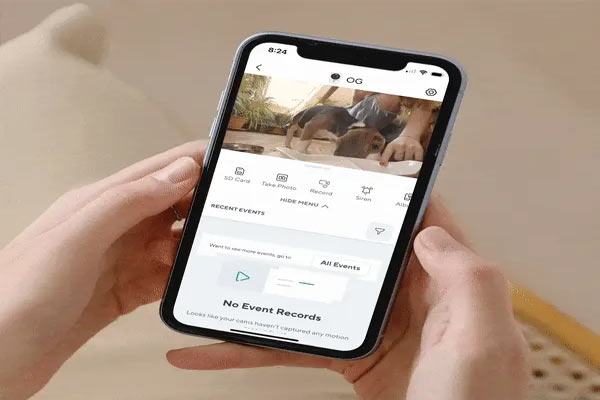
Configure your notification choices in the app’s settings. To get alerts when the camera spots activity, you may set up motion and sound detection alerts.
Step 12: Look into Extra Features
Utilize the two-way voice communication, night vision, and event recording capabilities of the Wyze Cam v2. Adjust the parameters to suit your tastes and requirements.
Conclusion
The Wyze Cam setup is simple, giving you the ability to monitor your environment with ease. You may have peace of mind knowing that you have a dependable and practical tool for remote monitoring with the Wyze Cam v2. You can quickly set up your Wyze Cam v2 to offer you with live video feed by following this tutorial.
Wyze Cam App For PC Blogs